Best Practices for Compost Methods
Compost Methods Review
In order to distinguish compost methods by living situation, I will break them up into the following categories: “Suburban Dwellers” and “Land Owners.”
Land Owner simply implies that you don’t have the neighbor or property restrictions a Suburban Dweller would. In fact, a Land Owner can pretty much do whatever they want for the most part. So their options are open to all compost methods.
Suburban Dwellers
Land Owners
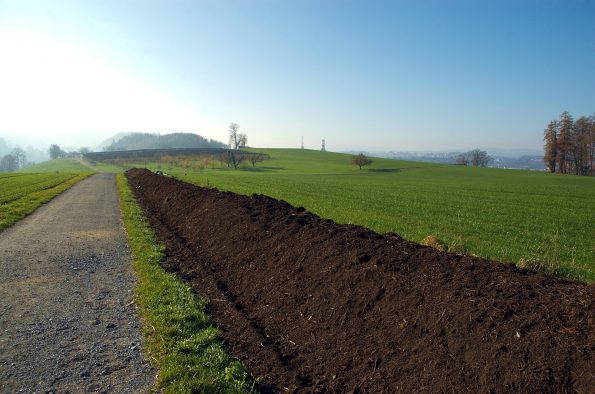
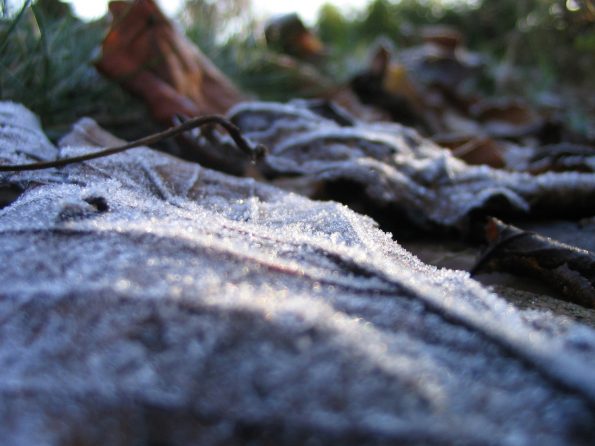
Compost is one of the very best soil building amendments you can put in your garden. That’s no secret, and it’s probably why you want to make your own. The good news is there are many compost methods available and the process is fairly straightforward.
Compost methods can vary depending on your needs. One of those needs may be the speed at which you wish the compost to be finished. Other needs may concern how much space you have available.
First, let’s discuss what causes organic material to become usable compost. Understanding the scientific reasons behind decaying matter might help you to better approach your own composting situation.
Depending on your needs, the speed at which you can create usable compost may help you best determine which compost method to choose.
Click here to bypass science and go straight to the methods.
Phases of Compost
There are two main phases or stages that most compost must go through, regardless of the compost method (unless you’re using a cold compost method). Three if you consider “done” to be a phase. They are:
- The Active or Thermophilic Phase
- The Curing Phase
- The Finished Phase
Active Phase:
 The Active phase can also be referred to as “thermophilic” because it is when temperatures reach a high level. This stage is incredibly important because it kills off harmful pathogens, weed seeds and will break down compounds that can be harmful to plants.
When piling a bunch of organic materials together to start composting, temperatures typically rise very quickly. In as little as 24 to 72 hours a pile’s internal temperatures can reach 130-150°F. This heat can be maintained for weeks.
Much the same way our bodies develop fevers to rid itself of harmful organisms, compost piles act similarly. You may witness your compost pile steaming. This can be expected.
At this point, it is too hot for beneficial fungi, bacteria and other microorganisms to survive. While their populations decline, thermophiles who operate best at temperatures above 113°F, replace them.
Bear in mind, if you start your compost pile in the late fall/winter, your temperatures may not reach the necessary levels. If that’s the case, your compost probably won’t be ready by spring.
Oxygen plays a huge role in aeration. Without it, the time it takes to break everything down can increase dramatically. We’re talking going from a few months to a year or more.
That’s why if time is of the essence, having the ability to turn or rotate your compost pile will make a huge difference as to when the final product will be available for use.
Moisture levels also need to be balanced. That is, not too much or too little. Ideally, it should clump together in your hand, but not have excess moisture dripping off. Make sure you incorporate these facts into your own compost methods.
Curing Phase:
 This stage can sometimes be overlooked but it is crucial. Amending soil with unfinished or immature compost, especially if plants are in that soil, can cause them great harm. Immature compost can be highly acidic, have elevated salt contents and/or have intense pH levels.
During the Curing Phase, the pile stops consuming oxygen so quickly. This means you can stop turning it. Temperatures also decrease to around 100°F.
There is no set time for curing. If you plan to apply your compost directly to soil with plants and are unsure if it is finished, the best advice might be to wait.
However, if you aren’t going to be planting anything for several months then you can probably get away with applying the compost. Most likely it will finish once it’s spread out and added to the soil before you actually plant anything.
Finished Phase:
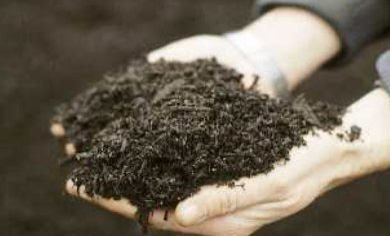 Finished compost can also be referred to as “stable”. Stability references whether or not the compost is still actively decomposing and is chemically and biologically safe. Since there isn’t really a specified time for curing, how is one to tell whether or not they have finished compost?
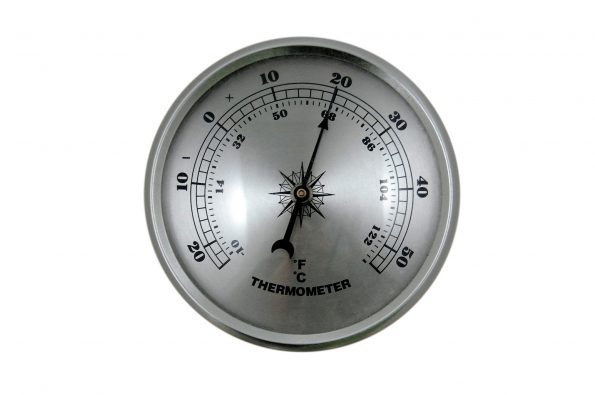
There are a few ways you can tell. One of the easiest is to measure temperatures in the center of the pile. If they are near ambient, then your compost might be finished or very close to it. Finished compost can also have a slightly sweet smell.
Another way to tell is by measuring oxygen concentration. When levels of oxygen at the center of the pile are greater than 10-15% for many days on end, then most likely your compost is finished. This measurement is usually only taken in commercial compost facilities.
Both of these measurements require roughly 50% moisture for measuring. And obviously, you will need measuring tools, such as a compost thermometer.
Prices definitely vary depending on the quality and length of the probe(s). Many even have gauges on them to tell you whether your pile is still “active” or not. Just please don’t use your BBQ meat thermometer…
Ratios
 I know, I know… you came here to learn about compost methods. We’ll get there shortly but first, let’s cover our bases so once you’re ready to pick a method you’ll know exactly what to do.
The reason ratios are important is because we want to encourage the beneficial microbes, not inhibit them. After all, composting is a microbial process. They do all the work for us!
There are 3 essential elements that make up good compost:
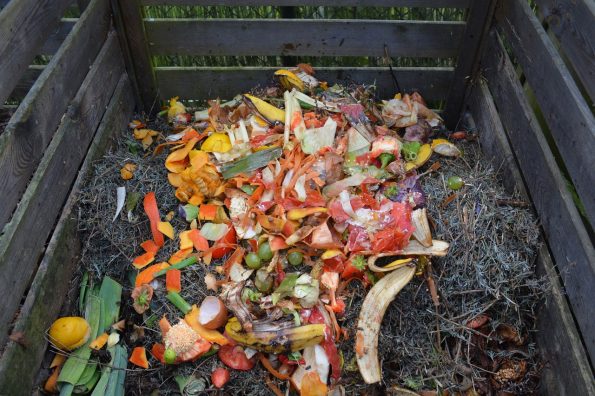
- The chemical makeup of “feedstocks.” Feedstocks are simply the materials we put into our compost. Of course, they should be nothing other than organic materials and preferably raw.
- The size and shape of those feedstocks (smaller particles are generally better).
- The population (and health) of the aforementioned beneficial microbes living within the compost.
 Feedstocks are pretty much just food for the microbes. An ideal situation would be to have a mixture of multiple types of feedstocks. Variety is the spice of life, is it not?
Another important factor is to have the proper amount of moisture in your feedstocks. Generally, you will want the moisture levels to be between 40-60%. Not saturated, but not dry either.
Random fact: when a mulch or compost pile gets too dry, especially during the active phase, it is susceptible to spontaneous combustion.
Carbon to Nitrogen Ratio
The last ratio we will discuss is the Carbon to Nitrogen, or C:N ratio. A good rule of thumb is to shoot for 20:1, or even better, between 25:1 and 35:1. In fact, some sources say that 40:1 is the best. But anything over that is not optimal. Mostly it depends on your feedstocks.
 Nitrogen is used by the microbes for their metabolic activity and we want them to use what’s available. If there is excess nitrogen (lower than 20:1) then it will leave your pile as stinky ammonia gas. Too little and it won’t support the microbes.
Elements that are high in carbon would be most woody materials. This includes leaves, straw, cardboard, sawdust, etc.
Examples of nitrogen-rich elements are manures, grass clippings, vegetable wastes and coffee grounds.
A tip for less stinky compost:
 No matter your compost method, make sure it is well aerated and at the appropriate moisture levels. This means turning it or whatever you have to do to keep the oxygen content high.
Sometimes you can’t help the rain. But if it gets too dry, wet it down with your garden hose. As mentioned above, an overly dry pile can be a fire hazard. So even during a low water crisis make sure your pile stays moist. Usually, carbon-rich materials will retain water pretty well.
As you’ve probably gathered, good and fast compost creation is done aerobically, with plenty of oxygen. When a pile sits too long and the microbes use the available oxygen, the process changes from aerobic to anaerobic (and the finished product takes much longer to obtain).
Anaerobic bacteria put off sulfur compounds and other byproducts that cause odor. Therefore it is in your best interest to keep oxygen content high and support the aerobic bacteria.
If you add stinky stuff like dead fish to your compost, then this tip won’t help.
Compost Methods
 Alright, now that we have a basic, fundamental understanding of the workings of compost, it’s time to discuss methods. After all, that’s what you came here for right?
Up until now, we have only discussed the science of the hot compost method.
There is, however, a cold compost method. This method is best suited for the lazy, as you go, or people who don’t care if their compost is ready quickly. That’s because the cold compost method takes much longer than the hot method.
Another drawback of the cold compost method is that it doesn’t kill weed seeds or harmful bacteria. Temperatures never reach levels high enough for this.
If you’re not careful, adding the wrong feedstocks such as diseased plants, weeds that have gone to seed or other things of this nature, all can end up being bad for your garden in the long run.
Nonetheless, the process is simple and if you’re into that, we’ll discuss it first.
Cold Compost Method
All you really have to do is heap your waste in a pile and wait. Be aware, though, that a large pile will heat up on its own. So this method will be better suited to accumulating small amounts at a time.
Don’t worry about chipping anything into smaller pieces. Just lay stuff down (preferably in layers) somewhere out of sight and smell range. It’s really simple because you just keep adding to it as you accumulate more feedstock.
Most of the feedstock you add is similar to what could be added in the hot compost methods. But as mentioned above, be sure to add “healthy” feedstock. To be safe, you should probably avoid adding weeds altogether. If you’re going to add kitchen scraps, make sure to bury them in the center of the pile to avoid pest problems.
Then all you do is wait. No turning or anything like that. Let your children grow up. Maybe earn a degree or something. It’s going to take a year or more until this is ready. Also, you may need some sort of activator to get things going.
Also, unless you live in an area where you can create a pile like this without complaint from your neighbors, then this method might not be an option. Same goes for a large hot compost pile.
Pit/Trench Compost Method
 This could also be considered one of the fairly easy compost methods. At least the process is simple. It also works best if you can rotate your garden beds/planting spaces annually. Preferably 3 spaces are needed; one for planting, one to lay fallow, and the other for the trench.
All you have to do is dig a trench about a foot deep. Add your finely chopped food and other feedstocks (don’t pile too high). Then add about 8″ or so of soil on top. Burying feedstocks that deep is sure to conceal foul odors. Plus any weed seeds won’t ever see enough light to sprout.
It can take several months to a year or more for this to break down, but it will be out of sight out of mind. There’s also no turning involved. The process could be likened to a hugelkultur mound, of which there are many benefits.
Now if you can rotate these trenches as mentioned above, then you can build great soil over time and have year-after-year success.
Dig a trench and start composting this year. Next year let it lay fallow to finish the process and dig another trench to compost in. The year after that: plant away in the first trench, let the second lay fallow, and dig a third trench for composting. Then simply rotate every year.
Word of Warning:
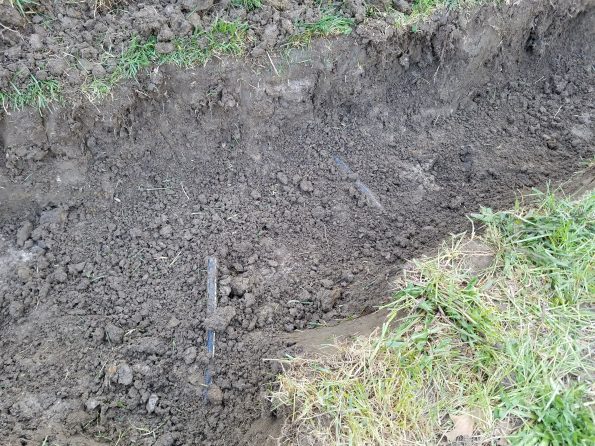
Before you start a digging project, make certain there are no buried power lines, gas lines, or anything of that nature. I’ve made this mistake and came upon buried power lines while digging my hugelkultur bed. Talk about dangerous!
Often times there are free services in your area that will come out and mark any buried utility lines. In my case, the Detroit area is serviced by Miss Dig. And I definitely should have called before digging.
Bin and Tumbler Compost Methods
As far as the average suburban backyard gardener/composter is concerned, these are probably the easiest and most common compost methods.
There are many commercially available bins or tumblers for composting. The main difference between a bin and a tumbler is simply that a standalone bin is stationary. Tumblers are great for, you guessed it, tumbling.
Bins
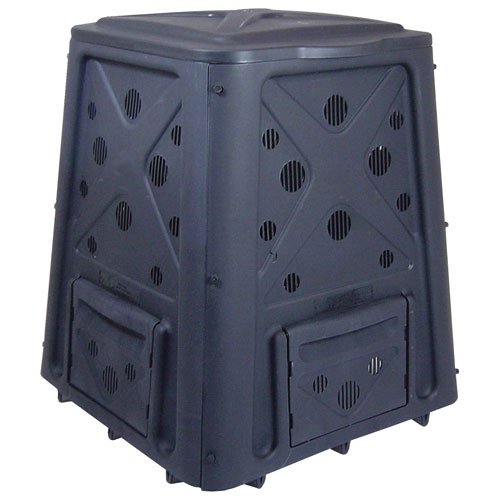 Bins tend to be a very easy approach to composting. The process can be slower, however, mostly because they lack aeration (anaerobic composting). Often times the compost won’t be ready for six months to two years. But that’s not always the case.
They are also more closely aligned to the cold composting method. So be sure to follow the recommendations above.
Some people add holes to their bins to help speed up the process. Many commercial bins have this feature as well. Another idea is to jam PVC pipes into the middle of the compost to help it breathe.
You can easily make your own bin or just use an old garbage pail with a lid that you set in the corner of your yard.
 One does not simply add woody material to a composting bin. It is primarily for yard and food wastes. Although, chipped leaves are okay. Run them over with your lawn mower to mulch them down. It’s easy to simply keep adding to a bin over time.
One of the main benefits for bins is that they can be used almost anywhere, including apartment balconies or even under the kitchen sink. Many have odor control mechanisms built in as well. They can also be as small as a one-gallon pail.
Some bins are bottomless because as you keep adding feedstock, the stuff on the bottom has been there longest and will finish first. This can be a bit of a pain though. How exactly do you know what’s finished and what isn’t? Plus you have to lift the bin to access it.
Tumblers
Tumblers are very similar to bins in size and shape, yet they are often found supported off the ground and horizontal. Most come with a crank handle for manual turning. If you consider yourself too feeble to turn a tumbler then this might not be for you.
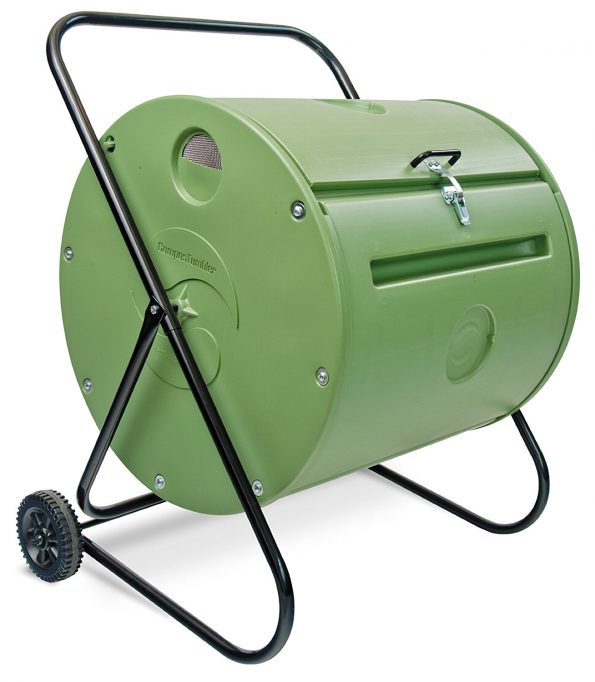 There are commercially available automatic tumblers available, but they are usually very expensive. If you’re handy enough you could probably fabricate one of your own. Then set it on a timer and forget it.
Of all the backyard composting methods, tumblers can create excellent compost the quickest. So long as you stick to a regular schedule of turning it, compost can be ready in as little as a month or two.
Unlike bin composting, tumblers offer the advantage of being up off the ground with a door that makes accessing finished compost easy. Ideally, the door should be big enough to get a shovel in and out of if you need to. But you should be able to open the door and for the most part, dump what you need into a wagon or something. This makes tumblers one of the easiest methods for making compost at home.
Speaking of wagons, I highly recommend a Gorilla Cart. Just bought one recently and it is hands down one of the handiest things I have ever used in my garden. It’s basically a wheelbarrow in wagon form, comes in different sizes and it dumps.
Sheet Composting
Sheet composting is one of the composting methods that doesn’t require a pile, turning, or anything like that. The process is also pretty simple but it doesn’t come without its own minor set of risks.
All you have to do is collect normal detritus from your yard such as leaves, grass clippings, garden debris, etc. Mulch it down as fine as possible and till it into the top layer of your soil. This can be done with hand equipment like a hoe or a motorized tiller.
I will probably try this in my own raised bed during late fall of this year. As with most compost, it still has to process. So it’s not a good idea to do this and immediately put plants in. You still have to give it time to break down.
The risks mentioned above have to do with the compost taking too long to break down. It’s possible this method could take an entire season to be usable.
Therefore if you want to prep a grow area ahead of time and know you’re not going to be planting in it during the first season, this may be just the method you’re looking for.
Trash Bag Method
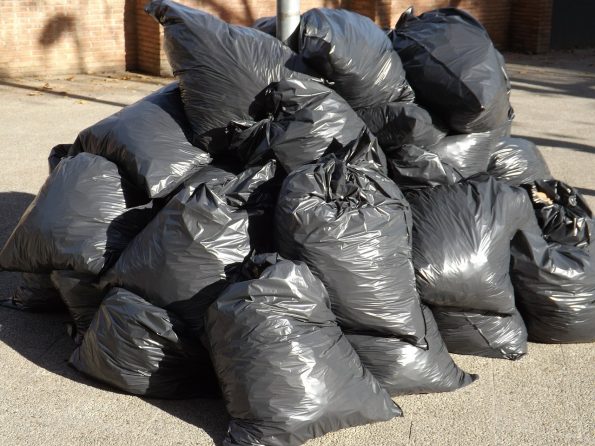 If you don’t mind a few (or several) unsightly black trash bags sunning somewhere in your back yard, then this could be one of the easier compost methods for you.
A black trash bag can do a couple of things at once. For one, they can retain moisture and the majority of odors. Secondly, black absorbs heat very well, so using black trash bags can help ensure that the compost inside reaches high enough temperatures to gain the benefits of hot composting.
The process is also pretty simple. Make sure you are using small particles of feedstock. Add your normal ingredients filling the bag as full as you can. Remember, normal ingredients follow the ratios specified above. Then spray with enough water to get the materials moist (not too much). Afterward, close the bag tightly and set it in a sunny place.
Even though the bag is stuffed to the top, it will shrink over time. Resist the urge to add more materials as this will only slow down the process. If more compost is what you need then create several bags at once.
Word on the street is this method will create finished compost quickly. Just keep in mind that wherever you set the bags, the grass underneath them will die. If you feel like the compost needs a good turning over, then simply pick up the bag and shake it.
Vermicomposting Method
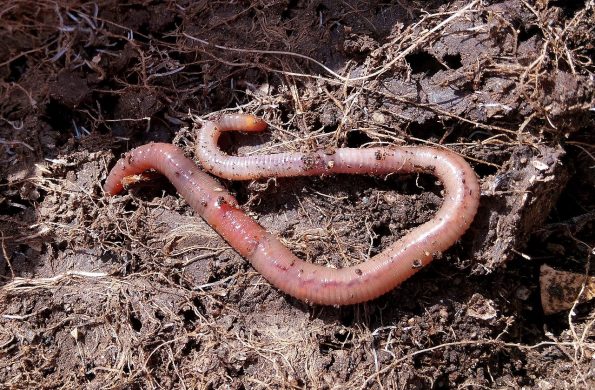 Vermicomposting refers to using worms to do the work of breaking things down. Red wigglers are the go to worms for this. But other worms like night crawlers can work well, too. If you didn’t know already, worm castings are an EXCELLENT amendment for your garden.
The basic process is as follows: you will need an opaque container to hold your worms and food scraps. Most any kind of plastic container should work fine. Next, you need some sort of moistened bedding material like straw or shredded paper to lay on top.
The worms will have a happy home eating, reproducing and making you some amazing compost. When it comes time to collect the castings, there is an easy way to do it (albeit not immediate).
Push everything to one side of the container and add new food scraps, covering again with bedding. Over time the worms will migrate over and you can collect the finished product.
The main drawback I see with this is that doing it on a large scale could require a lot of food scraps, worms, and effort. But it’s definitely not impossible.
Open Bin Composting
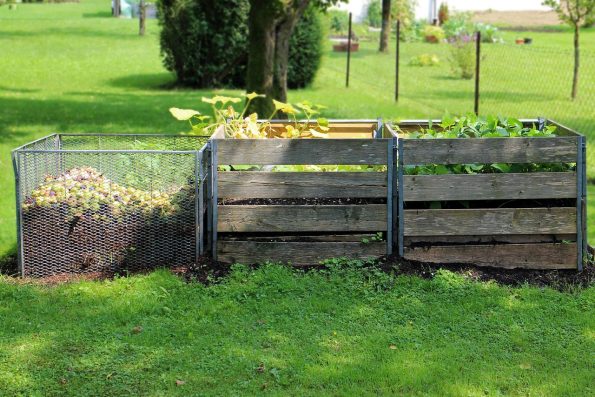 Last but not least let’s discuss one of the best compost methods out there. It is essentially pile composting and in all honesty, you’re gonna need plenty of room for this.
So if you’re living in the suburbs and don’t have much backyard space, this might not be the right choice for you.
Open bin composting needs a minimum of 4’x4′ area for piling. Creating a pile of this size will enable hot composting.
Yes, that also means you will have to turn your pile so make sure you have a pitchfork or shovel handy. It also means you should try and create a large pile at once so as to start the Active Phase.
Often times open bin composting is done with more than just one bin. In fact, usually, it’s 3 bins. The first is for fresh materials which will start the Active Phase. The second bin is for the Curing Phase. And the third is for, you guessed it, the Finished Phase.
The open bins are almost always made out of wood (make sure you are using chemical-free wood, or you can risk them seeping into your compost and ultimately your food). They are also 3 sided with an open front.
What makes the open bins so advantageous is that you can create your compost in batches. Plus, forking over the compost from one bin to the next will definitely add plenty of oxygen. As you know by now, this can significantly speed up the process.
Recap
Alright, now you have a significant amount of information to help you form a decision on compost methods. Before you go though, let’s have a quick review just so we’re clear on the processes and choices.
The Science
 Compost is decomposed organic matter. What causes decomposition is microbes. We support the microbes by providing them proper ratios of feedstocks, moisture, and oxygen (aerobic). This causes them to reproduce and work faster and harder.
When done properly, good compost can be finished sooner than later. Hooray microbes!
If we don’t support our aerobic microbes, they die off and give way to anaerobic microbes. These decompose much slower and they stink. Not exactly ideal.
Thanks for reading! If you found this information useful let us know in the comments below and please don’t hesitate to share. Subscribe for more tips and ideas for your garden from Grow To Save!
Very interesting subject , appreciate it for putting up. “Wrinkles should merely indicate where smiles have been
Valuable information. Fortunate me I discovered your website by chance, and I’m shocked why this twist of fate did not took place earlier! I bookmarked it.