2016: Year of My First Grow Bed
Hi and thanks for checking out my blog, Grow To Save! My name is Luke and this post will be about how I built my grow bed. First off, the reason I built it in the first place was for the same reason you’re probably interested in building one. There are numerous benefits to building a grow bed. Chances are you know that, so we don’t need to discuss it.
Choosing a Type of Wood
One point I want to make if you’re trying to decide on what type of wood to use. Do some research first. One thing I consistently saw when doing mine is that pressure treated wood, even though it sounds like an awesome idea, is a no no. It’s loaded with chemicals that you don’t want to leech into your soil. If they do, your plants will absorb them through the roots and you’ll be the one ultimately eating them.
Always choose untreated wood, whatever type it may be. You can certainly build a cheap grow box out of pine. I’ve even heard of plastic grow boxes. Some people even build grow tables that are up off the ground and better for you ergonomically. That’s all up to you.
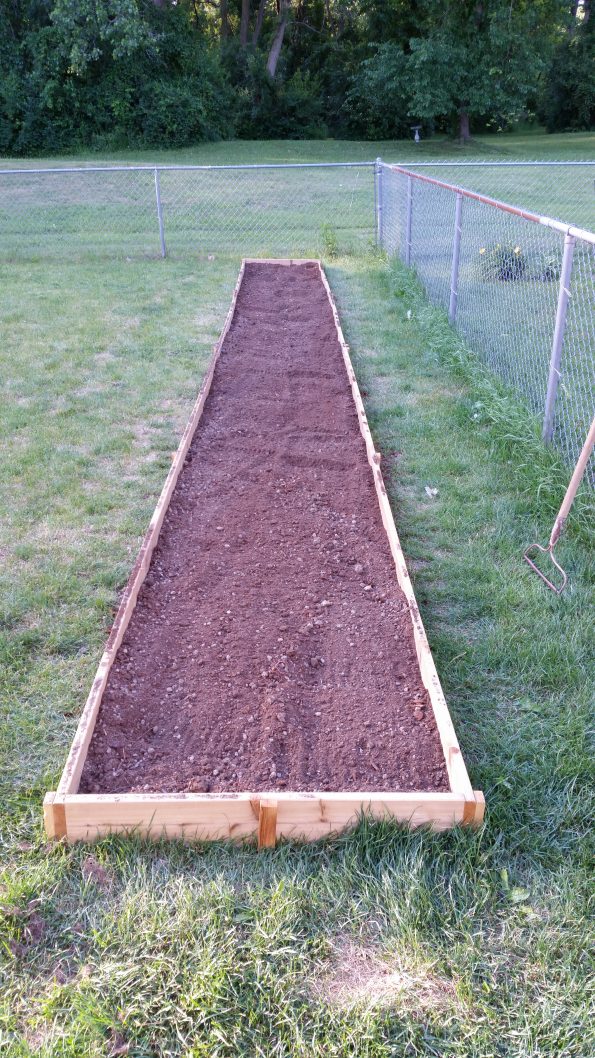
As for me, I built one really long (32 feet) grow bed. Most people probably won’t build them as long as I did. And I don’t think I’ve ever seen another one that’s as long as this. Actual dimensions are approximately 32’ x 3’ x 6” tall and made from cedar.
Cedar is an excellent choice of wood for building a grow bed, but it can be a little pricey. Depending on what you’re goal is, it may not be your best option. However, cedar will hold up for many years and serves a dual purpose as insects aren’t very fond of it. My goal is to get as many years out of mine as I can, and a little help with insects sounds great to me.
Choosing The Spot for My Grow Bed
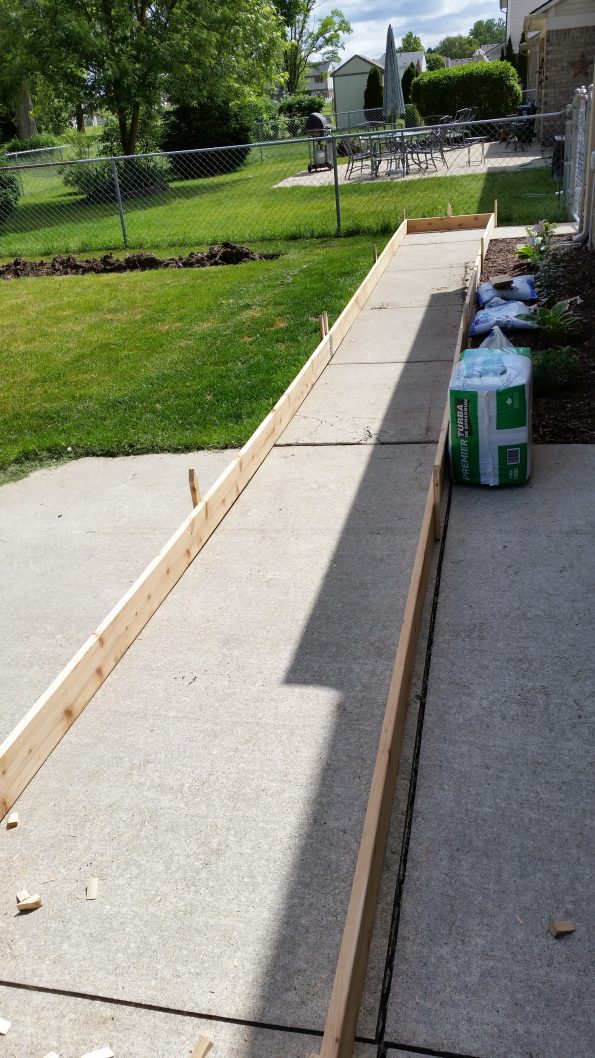
To get started I marked off the area where I wanted the bed to be with stakes and twine. These boxes are fairly permanent structures so they should be built with that in mind. In this case I put it along the fence line with a 34” gap in between. It’s big enough to be accessible with the lawnmower. It’s also the same distance as the sidewalk (close to the bed) from the fence.
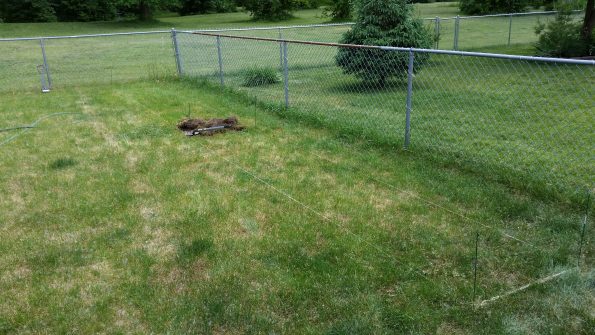
So far I have one grow bed along one side of our rectangular backyard. The idea I came up with, and the wife agreed to, was that I could eventually go around the entire perimeter of the yard. I built this box in 2016 and am hoping to build another this year. It’ll be on the other side of the yard if I can find the time. Although I will probably try to make a hugelkultur bed if possible. More on that later…
In considering regular lawn maintenance I also left about a 3’ gap along the back fence for mowing. It has proven to be a tiny bit of a pain as I can’t round the corner between the box and the fence with the lawnmower. Perhaps I shouldn’t have built the bed as long. But I am grateful for the extra space as I found out real quick how fast the bed fills up when you start planting. Larger crops like okra, squashes, broccoli, etc. need plenty of space so consider this when you’re planning out your own grow bed.
Once I determined the distance from the fence to the grow bed, it was time to decide width. That was fairly simple for me as I wanted to keep the yard as aesthetically pleasing as possible. So I basically made it the same width as the sidewalk that leads into the backyard at 36”.
Prepping the Ground
Before I ever even started building the grow box, I had to prep the ground to make ready for it to be put in place. This took removing all the sod, which I did by hand with a shovel.
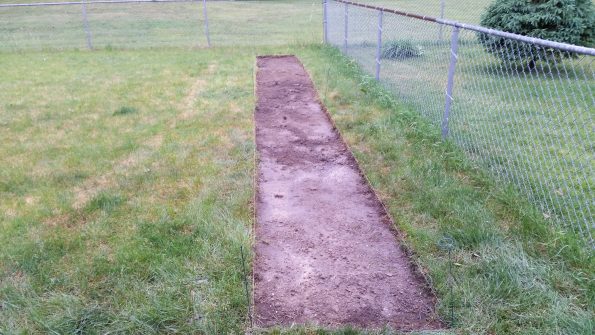
Something else I did was dig straight down along the edges of where the box would be. I figured it’d be much easier to do that and work the soil a little bit before the grow box was actually in place. And I do believe it was.
Building the Grow Box
I bought the wood at Lowes and altogether I think it was around $150 for everything including a few bags of peat moss and compost. That sounds high but the way I look at it, it’s going to be used for (hopefully) the next 10 years. Then it breaks down to only about $15 per year. The long-running wood came in 16’ x 6” x 1” pieces that I got 4 of. I also had to find the same type/size of wood in shorter length and make two 36” cuts.
In the middle I had to join the two 16’ pieces with a flat, toothed metal flange on either side, 4 flanges altogether. They are the type you hammer into place. For stakes I used 1” x 2” x 8’ cedar pieces that I cut to 11” long and used a skill saw to taper the ends.
There are 14 altogether and I spaced them evenly around the grow box with the exception of the middle where the two 16’ boards meet. I put two there, one on either plank just past the flange to help further stabilize the joint once in the ground.
When attaching the stakes it was definitely easiest to stand them next to the grow box flush with the ground and simply drill them in. Speaking of, one thing I didn’t spare expense on was good outdoor screws. If you think about it, your grow box is going to be very close to the ground and exposed to rain and your own watering for years on end. I didn’t want some crappy screws that’d be rusting anytime soon.
Once the bed was assembled my wife and I set it in place. Then I hammered down the stakes, which took a lot more effort than I thought it would. But that’s probably a good thing because I don’t want them coming out of the ground anytime soon.
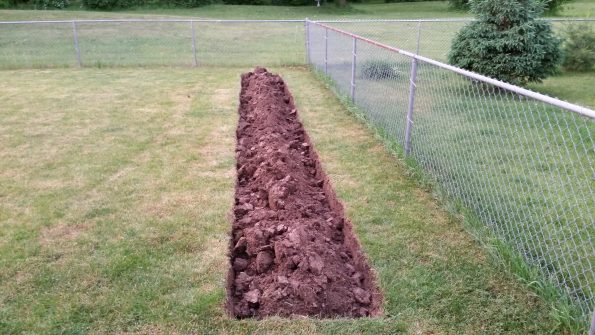
Tilling the Soil
At last the box was in place and looking good, but the soil still needed lots of work. At this point I went to Home Depot and rented a little Mantis hand tiller for the day. It was definitely necessary. I tilled the dirt down pretty deep as I wanted the soil to be as loose as possible.
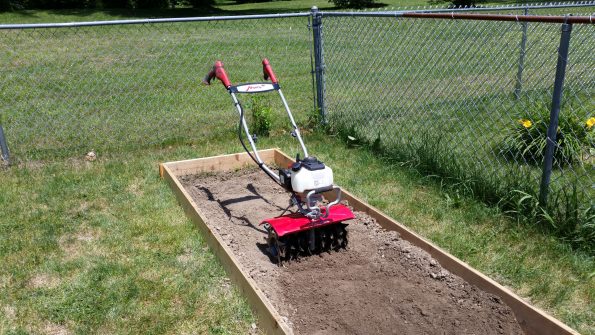
During the tilling process I came upon all sorts of rocks, rusty nails, glass, metal and other debris left behind during our home’s construction. Tilling was a lot longer process than I thought because of this. The rocks in particular jammed the blades a few times and I had to stop and work to get them out. Altogether though, I’m very glad I went through this process because all that garbage is removed from the bed.
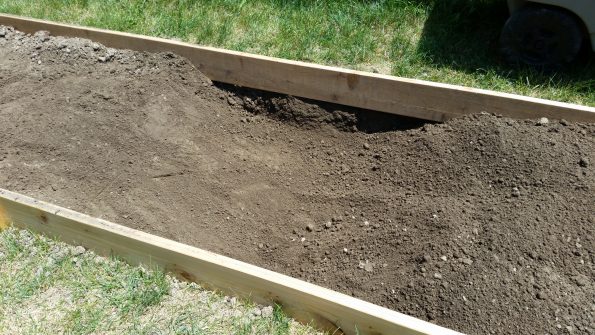
Once the deep tilling was done I could finally add the peat moss, compost and sand. I added these three things in particular because the native soil where I live in Michigan is more like clay. Peat moss and sand help with drainage and water retention while the compost adds nutrients for the plants. I spread these three on top of the loose soil and ran the tiller over everything once more.
Finished!
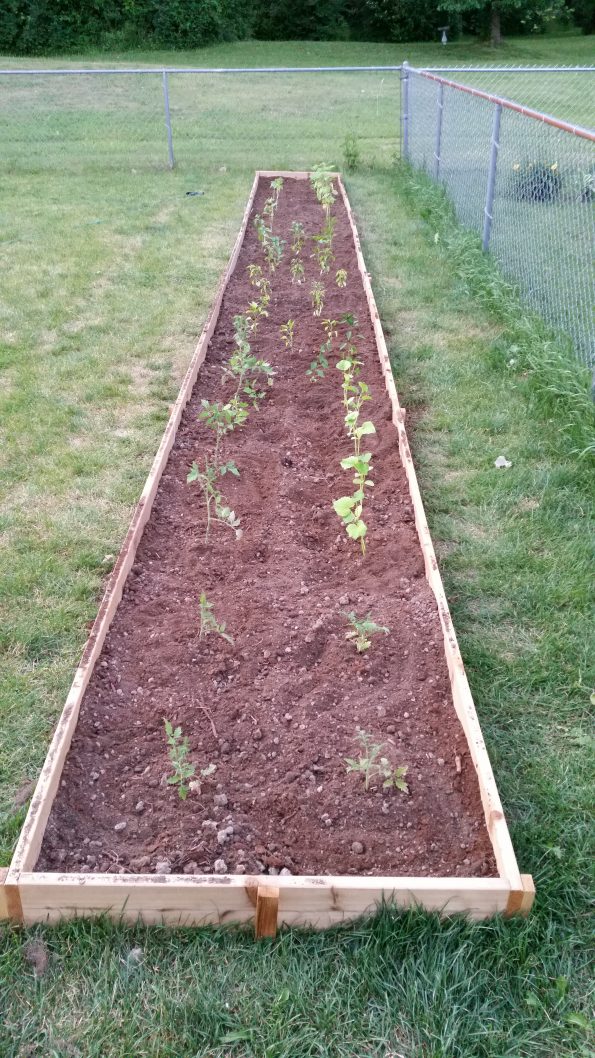
At long last I was done and ready to plant! And plant I did. In this one bed I was able to grow 8 tomato plants, 5 burpless cucumber (which I built a trellis for inside the bed), 27 various pepper plants, 8 okra and 4 green bean plants.
Was it worth it? I’d say it absolutely was and if you’re considering building a grow bed, I think you’ll find it’s worth it too. I’d love to know what you think of my grow bed. It’s actually my very first of many. If you found this article helpful please share it and subscribe to see more from Grow To Save!